Varus/Valgus Wedging with the Clearly Adjustable Heel Lift
The Clearly Adjustable Heel Lift can do more than raise the heel.
By trimming and stacking the individual layers, you can also create a side-to-side wedge. This may help when the foot or ankle tends to roll inward or outward.
This is called varus/valgus correction.
What This Means in Plain English
Some people need the heel lifted straight up. Other people also need the heel tilted slightly to one side. The Clearly Adjustable Heel Lift can be adjusted for either purpose.
You can use it to:
Raise the heel
Create a small inward or outward wedge
Do both at the same time
The advantage is that you do not need to add a separate wedge inside the shoe.
Important: Ask a Professional When Possible
Side-to-side correction affects how your foot, ankle, knee, hip, and back line up.
For best results, ask a podiatrist, chiropractor, physical therapist, orthotist, or other qualified professional to tell you:
Which foot needs correction
Whether the wedge should be on the inside or outside
How much correction to start with
How quickly to adjust the lift
Do not make large changes all at once.
Varus vs. Valgus: What’s the Difference?
Valgus / Pronation
This usually means the foot or ankle rolls inward.
The inside edge of the foot drops lower.
A wedge may be used to gently support or correct that inward roll.
Varus / Supination
This usually means the foot or ankle rolls outward.
The outside edge of the foot carries more pressure.
A wedge may be used to gently support or correct that outward roll.
How the Clearly Adjustable Lift Creates a Wedge
The lift is made of thin removable layers. Each layer is about 1 mm thick.
To create a wedge, you remove part of one or more layers from one side of the lift. This makes one side thinner than the other side.
That side-to-side difference creates the angle.
The degree of angular correction varies with the number of layers changed and the width of the lift. Side-to-side change of 1mm will produce approximately 1° of angular correction on the Small size lift, and 2/3° on the Large. Note that the overall height of the lift is not affected by varus/valgus wedging, as the center of the calcaneus still rests on the same number of layers
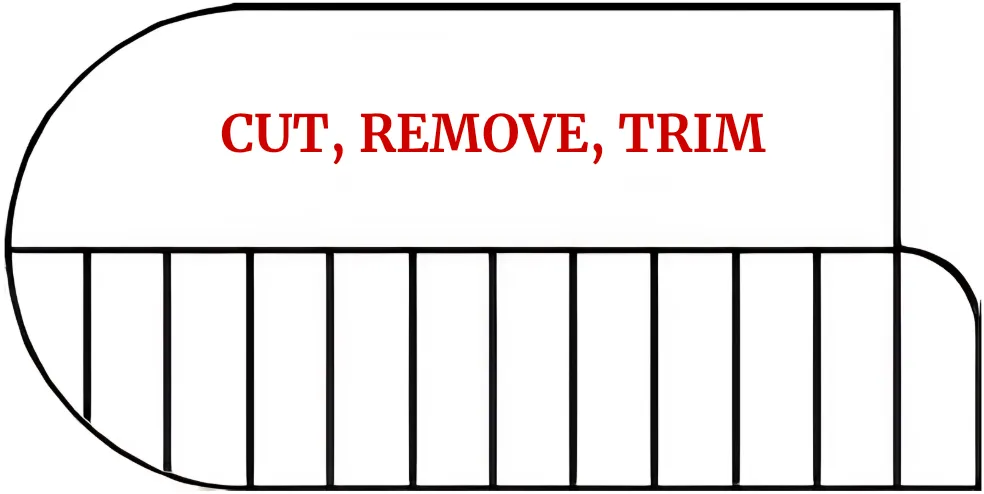
This procedure takes far longer to describe than to accomplish; the short description is that you cut off a piece from one edge of the lift, and place it along the other edge to form a wedge. The details are:
For one mm of angular correction, remove one of the upper layers of the lift, cut it down the middle, and remove one half. Round the corner.
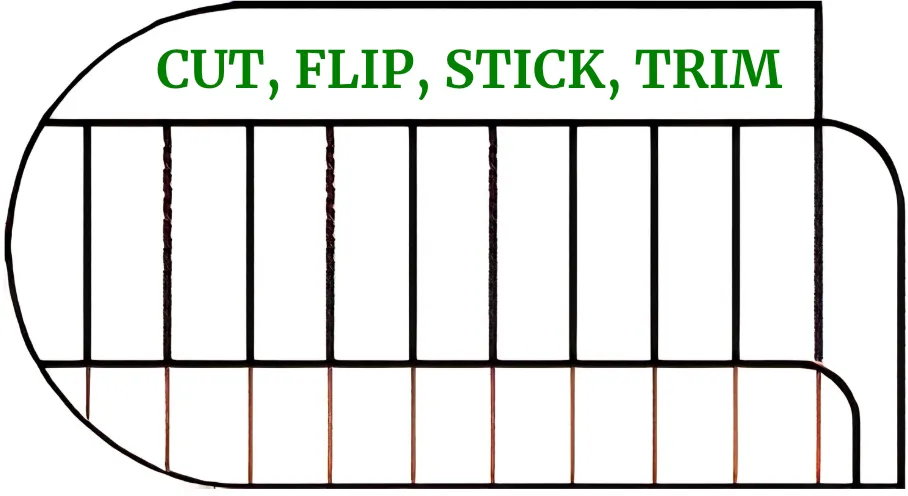
For two mm of correction, cut a layer one-third of the way from the edge, trim the small piece to shorten and round it, flip it over, and re-apply along the opposite edge.

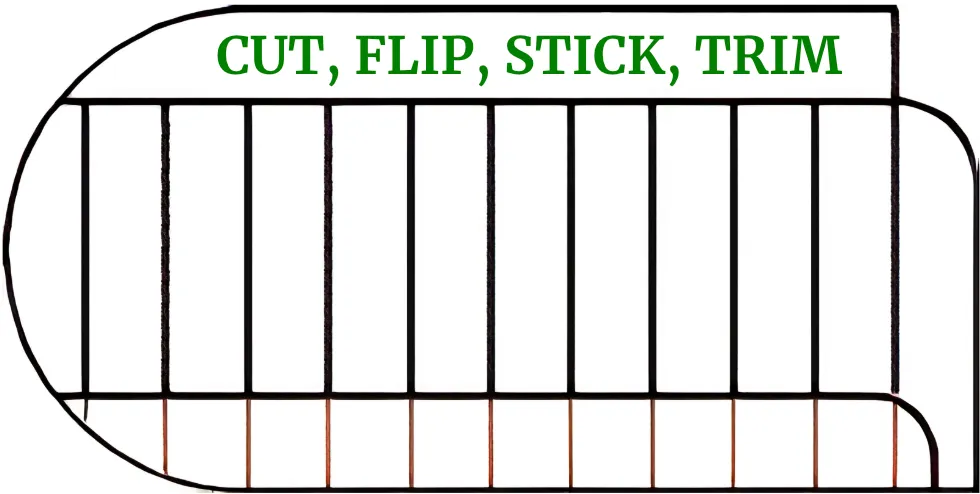
Three mm of correction is accomplished by modifying two layers; the second layer should be cut at the one-fourth point, rather than one-third. Trim to shorten and round the pieces before re-applying to taper the edge of the lift smoothly.
+
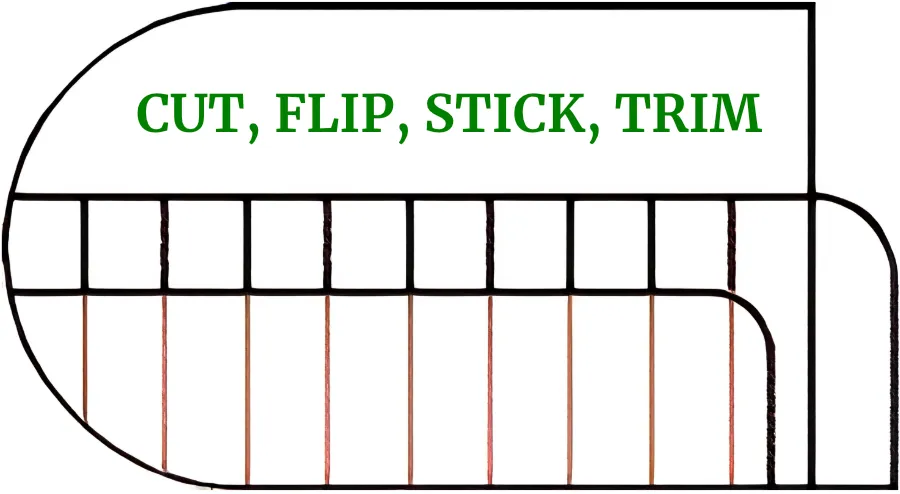
For four mm, two layers must be cut, at one-fifth and two-fifths of the way across. Trim one piece shorter than the other to feather the edge.
+
Five mm of lateral wedge requires adding one mm more correction (as in the first figure above) to the four mm correction.
Disclaimer: This content has been compiled from clinical literature and reputable medical sources for educational purposes only. It is not a substitute for professional medical advice. Leg length discrepancy should always be evaluated and managed by a qualified healthcare provider.
Some content on this page has been updated using AI.
©2002–2026 Clearly Adjustable.
U.S. Patents #D483556, ©2026